


Introduction
As you may have read in my Natural Diversity topic, I have recently discovered that it is possible to have parts of meshes appear with the same properties as the water in the game. I did this by adapting the existing material that is used for the water in river and lakes, and applying it to my mesh. In this brief tutorial, I will explain how to use this water appearance for your own meshes. While I used it in combination with a terrain alteration to create a naturally looking pond, it may be used for a great many other things, like fountains, canals or pools.

Disclaimer:
As I expect mainly experienced modders to be interested in utilizing this, I’m not going to explain the basics of how to create a mesh and have it show up in the game. There are other excellent tutorials that explain this in great detail.
Copyright Information
I am freely distributing the files I created to make this work, so that everyone can benefit from them. You are free to use these in your mods, just put an acknowledgement somewhere in the mod description ;).
Necessary Files
Just like any mesh, the Rivers and Lakes in banished get their look from referencing a specific Material file. Though the toolkit provides us with the Material files that are used for this, namely 'Material\River\RiverMaterial.rsc’ and ‘Material\Lake\LakeMaterial.rsc’ (which both use the ‘Material\River\RiverMaterial.srsl’ as a basis), using these original materials for some reason does not work for normal meshes. I have created an adaptation of these original files, so that the water Materials can be used to fit our needs. These files can be found in the attachment.
Unpack the zip and include everything in your *mymod* folder, so that the structure looks like this:
*mymod*\Material\Bartender\WaterMaterial.srsl
*mymod*\Material\Bartender\RiverMaterial.rsc
*mymod*\Material\Bartender\LakeMaterial.rsc
*mymod*\Material\Constants.srsl
*mymod*\Material\Lighting.srsl
Make sure that this structure doesn’t change, the files need to reference each other so if anything changes it will produce an error.
The mesh
Creating the mesh is probably the easiest modeling you’re ever going to do for Banished. All it needs is a horizontal plane, placed where you want the water to show up in the mesh. If your mesh has other parts that you don’t want turned into water, then make sure that this plane has its own unique material assigned to it. In my case, it is the only part of the mesh, so I’m using one material. For this example, I simply named the material ‘pond’.
For the UV maps, only the first channel matters for the water. I used to simple unwrap to create a map that is exactly square, just like the mesh. The UV mapping influences the movement of the water, so the best effect is achieved if the x/y proportions are the same as those of your mesh. The scale of the UV map influences the size and speed of the movement in your water. A big scale will result in very little movement, a tiny scale will result in huge waves. Depending on the size of your plane, you will need to play around with this in order to achieve the same size and speed as the natural water. The rotation of the UV map determines the direction of the movement.

That’s it for the modeling. There’s no need for textures associated with the water, as it uses the ones already supplied by the game. It also completely ignores any AO’s you might use for other parts of the mesh.
The Material file
To get the mesh to show up as water in the game, we need to direct it to the right material. This is done as with any material, with a properly named .rsc file in the MaterialInstance folder. In my example, this is the Pond.rsc file, placed in *mymod*\Buildings\Pond\MaterialInstance. It looks like this:
MaterialInstance resource
{
	Material _material = "Material\Bartender\LakeMaterial.rsc"; //For river, change to “Material\Bartender\RiverMaterial.rsc”;
	Texture _textures
	[
		{
			String _name = "water";
			ImageBuffer _texture = "Terrain\LakeWaterTexture.rsc"; //For river, change to “Terrain\RiverWaterTexture.rsc”;
		}
		{
			String _name = "frame";
			ImageBuffer _texture = "Terrain\RiverFrameCopyTexture.rsc";
		}
		{
			String _name = "reflection";
			ImageBuffer _texture = "Terrain\RiverReflect2Texture.rsc";
		}
		{
			String _name = "highlight";
			ImageBuffer _texture = "Terrain\RiverReflectTexture.rsc";
		}

	]
}
Since my pond is an isolated body of water, it uses the LakeMaterial.rsc, which creates calm and still water. If you wish to use the RiverMaterial.rsc, which creates water moving in a specific direction, change the file in the places described in the comments.
That’s all there is to it! Now if you place it in the game, this part of your mesh will show up as water.
There are a few final things I want to note:
- The colour and sky reflection of the water in rivers and lakes are largely created by an interaction with the underlying lowered terrain. Without this the water will look transparent, though the movement is still visible, and it still reflects nearby objects. In these cases some realism can be created by changing the colouring of the textures underneath the water, for example by making them slightly darker than the rest of the mesh.
- The first time you load the mod in the toolkit with the new material files, it may give an error upon closing the application. This does no harm whatsoever, and doesn’t happen anymore once the mod is packaged.
- It is possible to change other properties of the water by altering the WaterMaterial.srsl file, such as the speed of the movement. If you decide to make changes to this, please change the name of the folder from ‘Bartender’ to something else, to prevent your changes from affecting any other mods that use these files.
- For an explanation of how to use this technique to make water go around a corner, the trick is to adapt the mesh to make a turn, but to leave the UV channel straight. I'll show what I did:
I first separated my plane into several strokes (Here I did a few, but in the end it turned out that I needed much more. I subdivided them later). Make sure that the UV channel looks exactly the same (we're going to leave it that way).

Then I moved all the vertices on the left side of the plane to the same position, at the bottom of the square.

After that I rotated the vertices on the right side 45 degrees, and moved and scaled them so that they form the long side of the triangle and that there's a 90 degrees angle in the lower left corner.
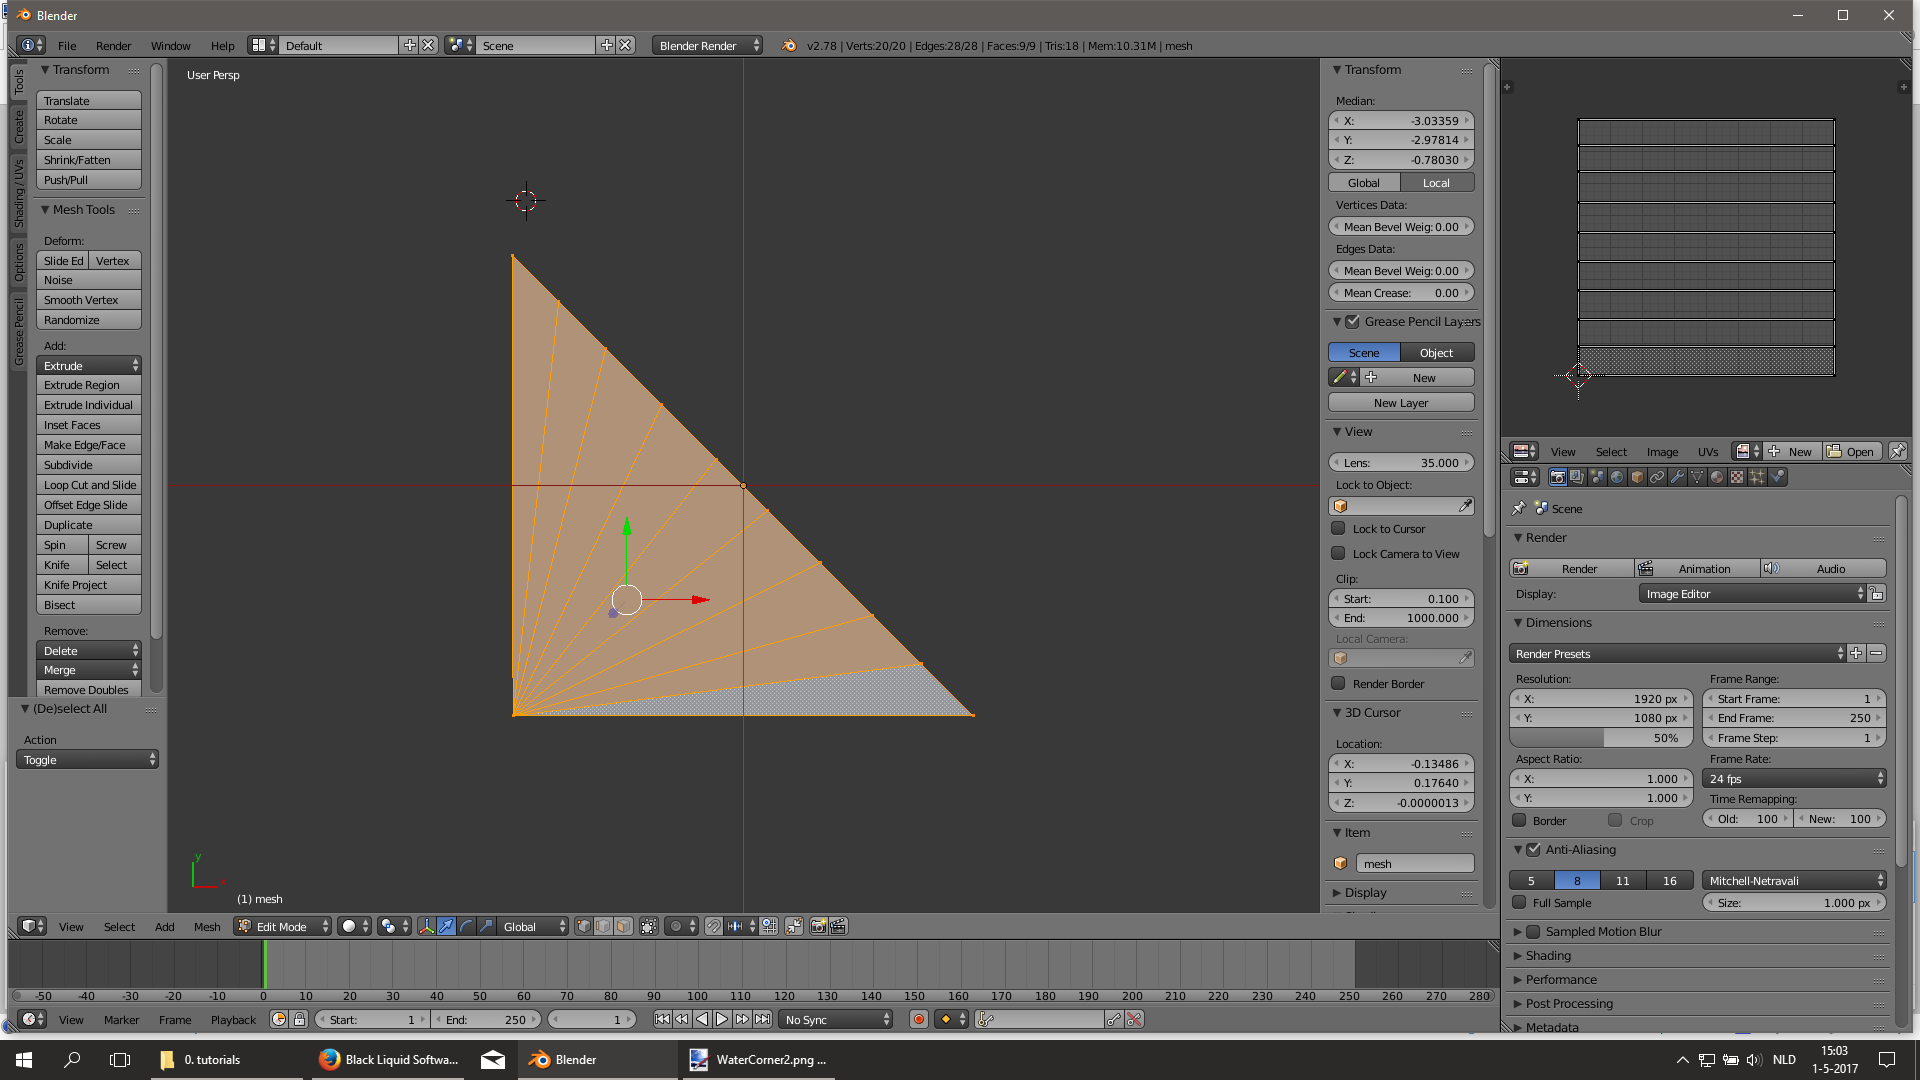
Then I moved the vertices of the long side around to make it look like a nice quarter circle

Here I tested it, and realised that it was not detailed enough; I could see clear edges in the water. So I used the option subdivide (I guess 3dsMax has a similar function?) to cut the triangles into multiple smaller ones. I had to increase the amount of triangles by a factor 3 (subdivide 2 times), resulting in a total of 27. In Blender this option automatically updates the UV map while still leaving it straight.


If you have any questions or comments regarding this tutorial, please post them below.
https://community.simtropolis.com/forums/forum/374-questions/


Sign In or register to comment...
To comment in reply, you must be a community member
Sign In
Already have an account? Sign in here.
Sign In NowCreate an Account
Sign up to join our friendly community. It's easy!
Register a New Account