


Article was originally created on the SimPeg website by Paeng, website now deleted and Paeng has given permission for it to be on Simtropolis.
Step 1 - Installing DAMN
This should be pretty straight forward as it comes with an installer.
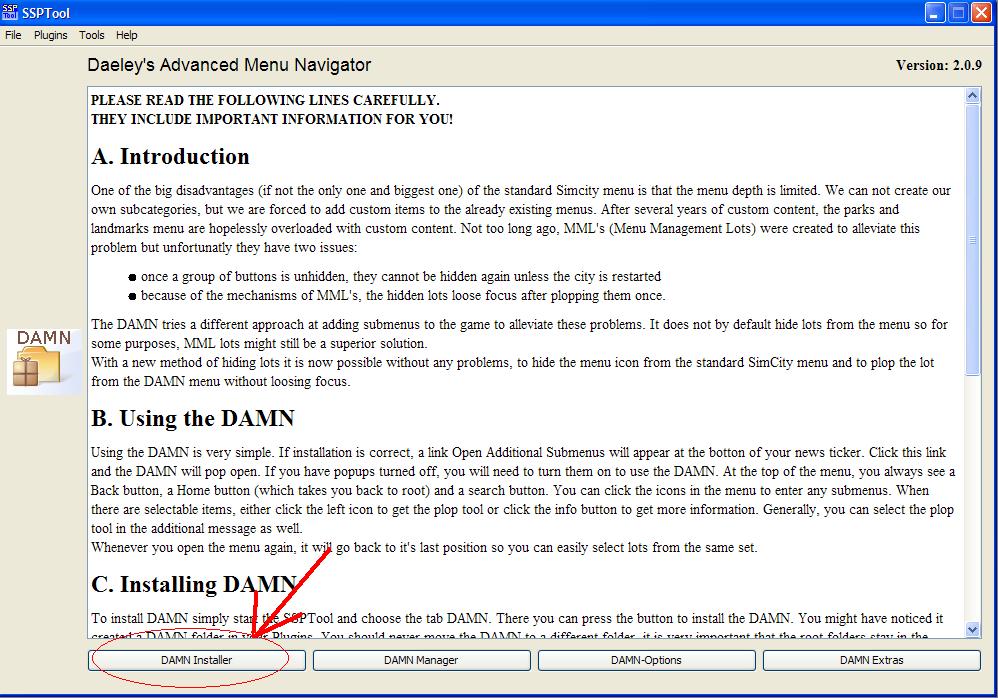
Default options for each menu - DAMN Installer, DAMN Options and DAMN Extras
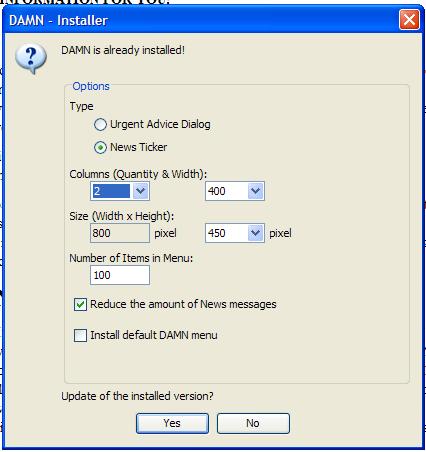
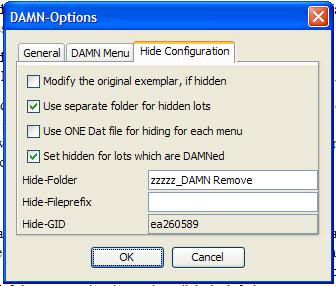

Watch for the install path - it is important that DAMN is installed into the proper place.
Normally, SC4 is installed into
c:\programs\Maxis\SimCity 4\
When you open that folder, you see a subfolder 'Plugins' - that's the one we're after.
So when you have run the installer, open
c:\programs\Maxis\SimCity 4\Plugins\
and you should see a new subfolder 'DAMN' - open this and see two further subfolders 'Root' and 'Support'.
Root is the place where all your custom menu definitions will be stored. Some samples are already there (e.g. SG Canals) - we'll deal with that later.
Support - there are a number of files in there as well... leave them alone for the moment.
So if we're in tune up to here, you could start the game now for a little test.
Open the 'News PopUp' by clicking at the blue link at the bottom or by clicking the button at bottom right.
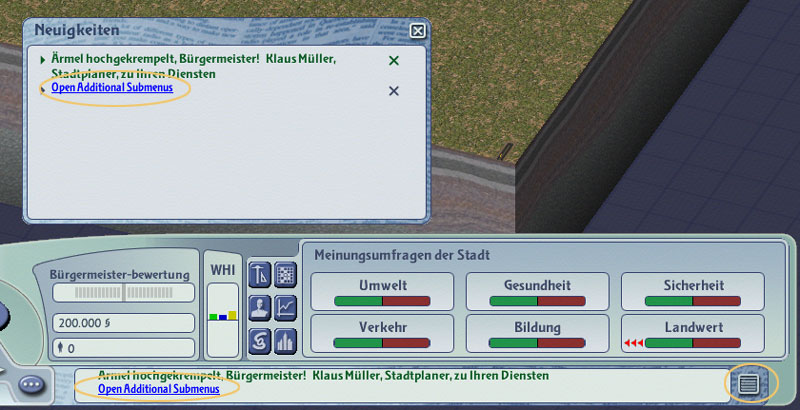
In the popup, click the blue link to open the menu. This is what the menu window looks like - just disregard the listing in the lower window - those are my menu definitions, so you'll see something different and much less (e.g. you'd see again those SG Canals).
Clicking on them will probably not work (yet) - unless you have those canals installed.

Anyway - all we wanted to check is if the menu system is properly installed and visible... so you can close the game again.
Part 2 - Installing SSP Tool and the SSP Tool DAMN Plugin
A) SSP Tool = https://sc4devotion.com/csxlex/lex_filedesc.php?lotGET=2191
Okay, after unzipping the archive you'll have a folder
SSPTool_Complete
which contains all program files. It doesn't really matter where you put it - for me, I got all my SC4 related tools (like LE, Reader etc.) at
c:\programs\SC4_utilities\
so this one goes there as well. Now when you open this folder, you'll see a file called 'SSPTool.bat' - that's for starting the program. I put a shortcut to this *.bat file on my desktop.
Notice also that there is a subfolder 'plugins' - keep that in mind, because we'll want to go there in a mo.
From the readme:
The tool is implemented in JAVA, so you need the JAVA Runtime Environment (JRE Version 6), which can be downloaded from Sun: http://java.sun.com
Most probably you got all that and won't have to fiddle around with it...
B) SSP Tool DAMN Plugin = https://sc4devotion.com/csxlex/lex_filedesc.php?lotGET=2450
Again, unpack the downloaded archive and you should have a folder
SSPTool-Plugin-DAMN
with lots of stuff inside that does not really need to concern you - just take this complete folder as is and move it into the plugins folder mentioned in the previous step (the subfolder 'plugins' inside 'SSPTool_Complete').
That's it. We're now ready to configure this thing and then start setting up our menus.
Part 3 - Setting up your own menus
In order to start with a clean slate, here is my suggestion: Go back to the Root folder of the DAMN -
c:\programs\Maxis\SimCity 4\Plugins\DAMN\Root\
and clean it out... throw away those sample definitions or move them out for safekeeping - just make sure the folder is empty.
Okay, now fire her up... remember how? Yes, doubleclick that 'SSPTool.bat' (easy if you prepared the suggested shortcut ;-). It may take a little moment to start up, then comes a welcome screen, click 'Ok' and finally the tool is open. If you followed the steps, the current screen should show the readme for using the DAMN plugin.

Before anything else, lets check a few things - from the menubar at top open the menu 'Tools' and go into the 'Options'.

For the moment just check the paths - one is the install path for SC4, the other one for your Plugins (the one in 'MyDocuments'). Check that both are correct. Leave the other options alone until you are familiar with the basic functions of the program. Click 'Ok' to leave this dialog.
At the bottom of the main window you see four large buttons. We don't need the 'Installer' anymore, we're done with that. The 'Options' and 'Extras' - again, leave them alone until you are familiar with the program and its basic functions.
So that leaves the 'Manager' - hit it. Lets look at the mainscreen:

On top left (1) you see your current plugins (in 'My_Documents'). Bottom left (2) shows your 'DAMN\Root' (which should be empty now).
Now it's time to choose the first plugin to turn into a DAMN menu. For this demo I decided to use the SPAR set (because it is big and organized in several subfolders). If you are a SPAM BetaTester, you might even have that set in your Plugins as well and can follow my steps exactly.
So I click my way through the tree -
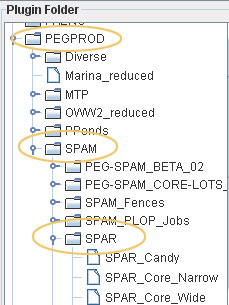
Now you should do some thinking - how do you want to organize your menus? Remember - whatever you set up in the folder 'Root' is the hierarchy for your custom menus. It is completely independent from your plugins, which will not be changed or influenced by the way you set up your menus! So you have all freedom to arrange things in a logical way that makes things easy to find.
Back to the SPAR - it is dependent of the SPAM (as will be other sets), so I want to start with a folder SPAM. Hit the + button in the Root window (2), enter SPAM, hit Ok.
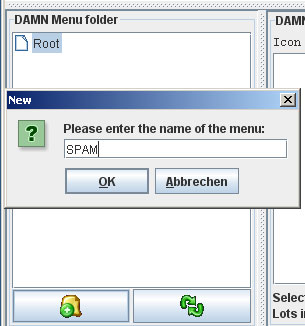
Since the SPAR set is nicely organized in subsets, I want to keep that - so I copy the hierarchy (keep on adding subfolders as described). When done, it should look like this:

Now you can fill those menus. In window 1, select 'SPAR_Candy'. You'll see the details of all associated lots in the window beside it (1a).
* Note: Normally you'd also see a preview of the currently selected lot in the last window (1b) - here you don't, because I have removed the preview PNG from the lots to keep the file size down.

Okay, the first lot is already highlighted - press SHIFT and click on the last lot, so all of them are now selected.
Make sure that in window 2 the folder 'Candy' is selected as well!

Finally click on the 'Dice' button to add the selected lots to the menu.
The result should look like this:

That's it... repeat these steps for each subset, always making sure that you have highlighted the corresponding folders in window 1 and window 2.
When everything is done, hit the button 'Apply' at the bottom of the window. The prog will shake, rattle and hum for a while and finally alert you that everything is done: "Index successfully generated!"
You can now take a peek at the DAMN\Root\ folder - you'll see there exactly the folders that you have set up for your menu (in window 2).
At this point some words about this Root folder - you should not try to add things there directly. However, you can tweak things like changing the name of a folder or rearranging them. Keep in mind though - if ever you decide to do this, you need to re-index the whole thing (that's what the prog did automatically during the shake, rattle and hum). So how do you re-index manually?
Look at the DAMN folder's second subfolder - 'Support'. In there you'll find a file called 'DAMN-Indexer.cmd' - double click that to re-index manually (might as well prepare a second shortcut on your desktop). So whenever you change things around outside the program (not using the 'Apply' button), hit that 'DAMN-Indexer.cmd'!
Depending on what you have your size and columns set to in here
Will determine how the DAMN menu will look in-game - some examples
2 Columns x Width 300 (Size 600x450)

1 Column x Width 300 (Size 300x700)

1 Column x Width 300 (Size 300x1000)


Sign In or register to comment...
To comment in reply, you must be a community member
Sign In
Already have an account? Sign in here.
Sign In NowCreate an Account
Sign up to join our friendly community. It's easy!
Register a New Account