


Contributor/author(s): Simpleton
An aggravating general standard practice of SC3K U/L is the rather gross amount of switchbacks you can end up with when building bridges and tunnels, plus consequent wasted tile space. This is particularly so in an inner city area where in real life cities considerable effort goes into keeping the road system as flat as possible and area at a premium.
The difference in height between the road on the bridge and the road on the terrain the bridge is built upon is 52 metres! You cannot have any of the SimCity bridges completely flat but you can reduce them to just 13 metres difference in road height.
There is a good argument for generally using higher level city centre terrain and river banks when setting-up at the outset of a game rather than the 26 metre many people go for. You also then have the land depth to be able to use an inner city underpass system.
You have some choices: the below image shows the appearance between a 'flat entry' bridge built on 65 metres elevation and a conventional bridge built on 26 metres elevation.

The below image shows the choice in river banks you can have. Either the 'Convex Bank' or the 'Beached Bank'. Each can do a bit extra for your overall effect.

To minimise hills up to bridges and obtain entries which are as flat as possible is very easy with either single or double bridges.
Single flat entry bridge
- The easiest method is to have terrain already set at 65 metres elevation (check elevation with the Query Tool and adjust with the Raise Height and Level tools.
-
For a single bridge simply run a row of road tiles from at least 5 tiles from the actual water edge, across the river, and a similar number of tiles the other side.
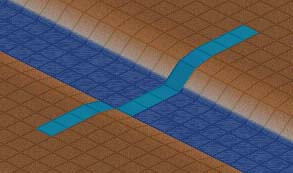
- Release the mouse button and accept the 'build bridge' invite. The bridge will build flat for you with no further work required. It is literally nearly as easy as laying any section of road.
Double flat entry bridge
- First put in some road marker tiles along the your dual carriageway to run to the river. Keep the markers six tiles clear of the bank.
-
Select a tile 5 tiles out from the bank and 1 tile to the side of the marker tiles. Now run a road section through as per 2 above to build the 'phantom bridge'.
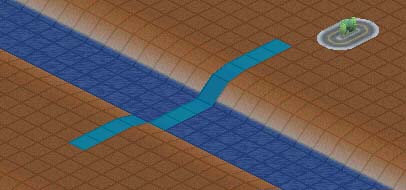
Then accept 'Build Bridge' invite.
- Bulldoze this bridge and associated road tiles. DO NOT TOUCH THE TERRAIN LEVELS!
-
Select Built Road and place the cursor against one of your marker tiles but leaving a one tile space between the first bridge and this new one. Draw the cursor across the river as before.

Note I have left a row of road tiles to show the axis of where the first bridge was.
- Release the button and accept the 'Build Bridge' invite.
-
Build the second bridge - running the cursor between the 'phantom bridge' and the existing bridge.
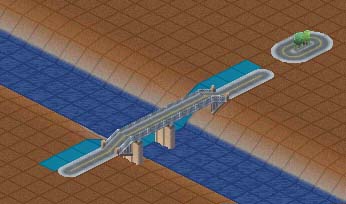
A double bridge will build flat for you.
You will now have the image shown below.

Casual height adjustments
You may not have (or want) your bridge entry and exits at the same height but still want a flat entry/exit. This is also easy.
- Once the bridge(s) is/are complete, bulldoze all road tiles on the side you wish to work on.
- Leave a 1 tile space from the bridge entry portals and use the Raise Terrain tool in single clicks to adjust the angle of the exit tile (You can also make it slope up or down if you wish)
- Now use the Level Terrain tool to get the effect you want over the area you want.


There are no comments to display.
Sign In or register to comment...
To comment in reply, you must be a community member
Sign In
Already have an account? Sign in here.
Sign In NowCreate an Account
Sign up to join our friendly community. It's easy!
Register a New Account