


Contributor/author(s): Douwe, evolved from previous work by: Simpleton, Martin Laforce, Andro, Chris S., Kyle D.J.
(Originally published 04 August 2002.)
(Editor's update: Contrary to what this article may state, these road-to-highway connections are non-functional—traffic cannot cross these connections. If you build these in your city, they will be "broken links" in your transportation network. Therefore, these connections are useful only for aesthetics, for example, if you are trying to replicate a real-world city in detail. If you use these connections, be sure to have alternate transportation routes so that your city will function properly.)
Introduction
Because of a recent request from Simpleton for a complete article on the method for building a ramped highway-avenue interconnection (for which a brief description was included in the "Group Effort Article" titled "Interconnecting highways and roads"), here is a step by step tutorial of the method which results in what Simpleton has characterized as having "a natural visual flow" but which also is, for all the simplicity of the result, also in his words, "as dear as poison without the cheat". The purpose of this procedure is to create the illusion of a raised highway gradually lowering to terrain level and becoming a surface level avenue.
Elevations by the numbers
This method requires an understanding of elevations in SimCity 3000 so at the risk of boring some experienced players, I will briefly explain some salient points regarding this subject. SimCity 3000 elevations datum from sea level (0 meters). Elevations rise (or fall) in minimum increments of 13 meters. Each click of the raise or lower terrain tool is one increment. An important consideration in this exercise is the height of the SimCity highway, which is 52 meters.
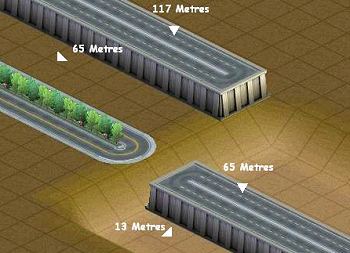
Since 0 meters and less altitude is under water, the lowest elevation at which structures (other than pipes and subways) can be built is 13 meters and therefore the lowest level the deck of a highway can be is (13 meters + 52 meters) 65 meters. In other words, this effect can only be used with the avenue on a terrain of 65 meters or higher. Simpleton, in several articles on bridges and tunnels, points out that this 65 meters altitude accommodates level approaches to bridges and allows aesthetically pleasing tunnel approaches. Because for many purposes this elevation is ideal, I have used it in my example screen shots. Whatever elevation you choose to build upon (the minimum is 65 meters), always consider the 52 metre difference in the level of the avenue and the Highway's road surface.
To cheat or not to cheat
This is an extremely expensive exercise so I recommend that you use the "i am weak" cheat (details in the Underground section) unless you are filthy rich. Even so, the extensive use of the bulldozer will still cost you Simoleons aplenty.
An engineering "blueprint"
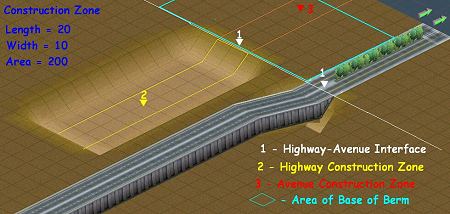
A picture is worth a 1000 words; presumably a picture with labels is worth more. The annotated screen shot below by locating the construction zones in relation to the completed project, highlights its immense scale. Before you try creating this effect in a developing city, take note of the extensive area affected by it.
Off to work
Not only is this an expensive procedure but also a complicated one. At first it may not seem logical but bear with me. I know of no other way to get the result we're after. Assuming you have your terrain at your desired level, using the Lower and Level Terrain Tools, create a 4 tiles by 10 tiles rectangular trench 52 meters lower than your terrain , a berm with a 6 tiles by 10 tiles base and 2 tiles by 6 tiles top at an elevation 104 meters higher than your terrain. The tunnel you create will build its own egress, so there is no need to waste time or Simoleons digging a second trench. The size of these excavations is the minimum to get the desired result. Although the finished ramp is only 2 tiles wide, the procedure is unstable at less than 4 tiles wide and may result in a "wobbly" ramp. Here are the step by step details (be sure to count tiles carefully):
Step 1 - Select the Lower Terrain tool and click 4 times (lowers terrain 52 meters) on a tile 12 tiles away from where you want your connection to be and one tile to the side.
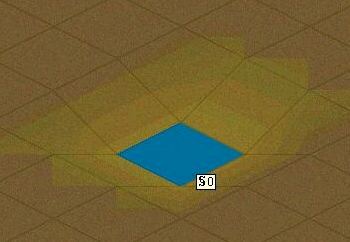
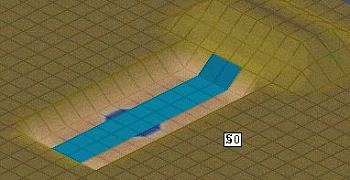
Step 2 - Select the Level Terrain Tool, click on the indentation from Step 1, and drag until the drop shadow is a 4X10 rectangle.
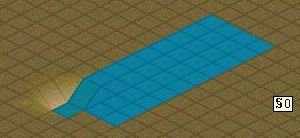
Step 2A - Release. You should now have a trench that looks like this:

Step 3 - Now build a four tile strip of Road to use as a "Forcer" for berm construction.
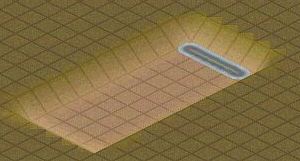
Step 4 - Using the Raise Terrain tool on the third tile beyond the edge of the trench pull the terrain up till the drop shadow turns red.
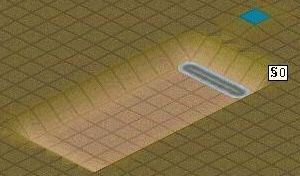
Step 5 - Now using the Level Terrain tool again, click on the tile you just raised and level the terrain to form a berm as shown.
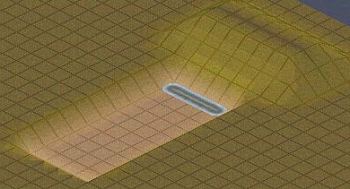 Step 6 - Bulldoze the 4 Road tiles. Using the Surface Water tool place 2 water tiles in the 6th tiles away from the berm and centred in the trench, as shown.
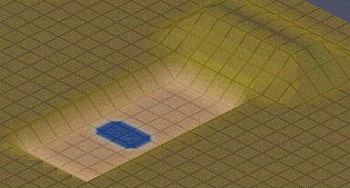
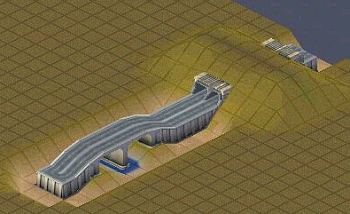
Step 7 - Select the Highway tool, click on one of the two central tiles at the non-berm end of the trench, and drag it across the two water tiles and up to and including the first set of angled tiles, as shown.
Step 7A - Release. You should get two pop-up Screens: "Do you wish to build a Bridge?" and "Do you wish to build a Tunnel?" Click OK in both instances. This should be your result:
Step 8 - Using the Bulldozer tool, carefully destroy all of the following: the exit side of the tunnel including its Highway component, all of the Highway in the trench including the Bridge up to but not including the wedge shaped piece of the Highway next to the Tunnel entrance, and finally, very gingerly, one at a time, so as not to damage the wedge, the remaining tunnel elements. You should now have this:
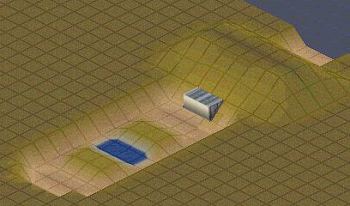
Step 9 - Using the Level Terrain tool dragging technique, level the berm as shown.
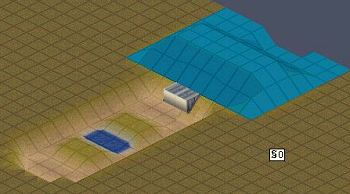
Step 9A - Level the trench.
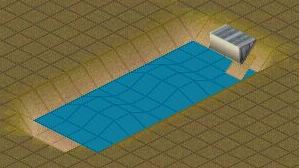
Step 10 - Now using the Raise Terrain tool, click once on a tile in the second row of tiles away from the Highway wedge that remains, thus raising it 13 meters.
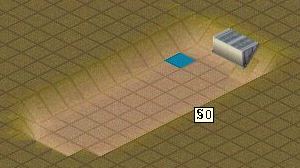
Step 11 - Using the Level Terrain tool, level the terrain in the trench away from the tile you just raised to the same level leaving a one tile by 4 tile ramp in front of the highway wedge.
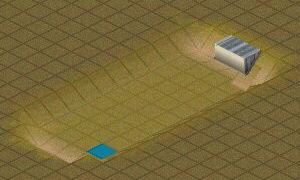
Step 12 - Using the Raise Terrain tool, raise the level of one of the tiles of the third row 1 click (13 meters), and again level the remainder of the trench.
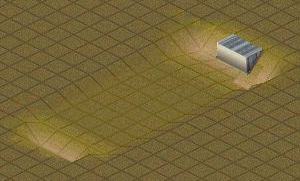
Repeat Step 12 for rows 4 and 5. You should now have a ramp that looks like this:
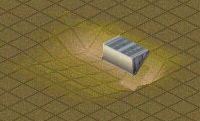
Step 13 - Using the Highway tool build a highway down the ramp towards the Highway Wedge, starting at least four tiles behind the ramp to avoid the programme from altering your ramp. Level Terrain to close the remaining remnants of the trench around your ramped highway.
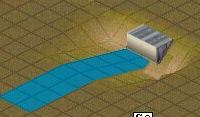
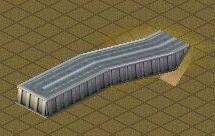
Step 14 - You're almost there! Build power lines on four tiles across the connection point of the Highway to force the connection and then build your avenue towards the highway. These powerlines should be kept until all construction in the immediate neighbourhood is complete to avoid the connection breaking. They can then be dispensed with.

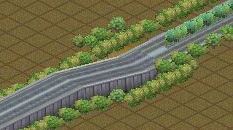
Step 15 - Garnish to taste. And, enjoy.
See also
 Avenues: form or functional?
Highways to avenues: avoiding tunnels
Interconnecting highways with roads
Y-Splits for highways
Highway interchange mania


There are no comments to display.
Sign In or register to comment...
To comment in reply, you must be a community member
Sign In
Already have an account? Sign in here.
Sign In NowCreate an Account
Sign up to join our friendly community. It's easy!
Register a New Account